Overview
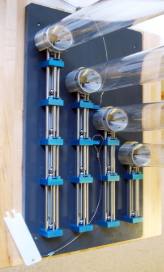
For my Multidisciplinary Design Program project, I worked with the Ann Arbor Hands-On Museum to redesign a donated Gauss cannon exhibit into a safer, more intuitive, and child-friendly museum experience.
The original exhibit demonstrated the additive effect of magnetic forces, but it was difficult to reset, hard for children to use, and impractical for daily museum operation. Our goal was to create a durable hands-on exhibit that preserved the core physics while making the interaction understandable and reliable for young users.
Project Goal
The exhibit needed to show that magnetic forces can add together to increase projectile velocity. In a Gauss cannon, a steel ball accelerates toward a magnet, collides with a chain of balls, and launches the final ball at a higher speed.
For a museum exhibit, the engineering problem was not just making the launcher work. It also had to be safe, repeatable, intuitive, maintainable, and durable enough for heavy daily use by children.
Design Constraints
The project was shaped by several constraints:
- Children above age 5 should be able to achieve a successful launch using only the exhibit and posted instructions
- All magnets must be contained within the exhibit
- No user-accessible electrical contact surfaces
- External surfaces must remain below 43°C
- The exhibit must run continuously through a normal museum day
- Wear parts should be replaceable and preferably off the shelf
- The physics should remain visible and understandable to users
System Architecture Trade Study
Early in the project, the team compared two main architectures: an electromagnet-based launcher and a permanent-magnet launcher.
The electromagnet route offered adjustability and potential reset advantages, but introduced thermal management, wiring, controls, and electrical safety concerns. The permanent magnet route preserved the original exhibit’s visible cause-and-effect relationship while avoiding power and overheating concerns.

The permanent magnet system was selected because it better preserved the educational objective of the exhibit while keeping the physics visible and intuitive. Users can see the sequence of alignment, collision, and launch rather than interacting with a hidden electrical system.
Permanent Magnet Prototype Development
My main work focused on the permanent magnet architecture. I played a key role in developing and testing physical prototypes to understand how magnet spacing, ball spacing, track constraints, and impact geometry affected launch consistency.
The prototype work focused on answering practical design questions:
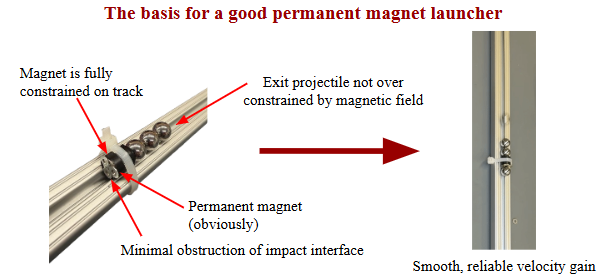
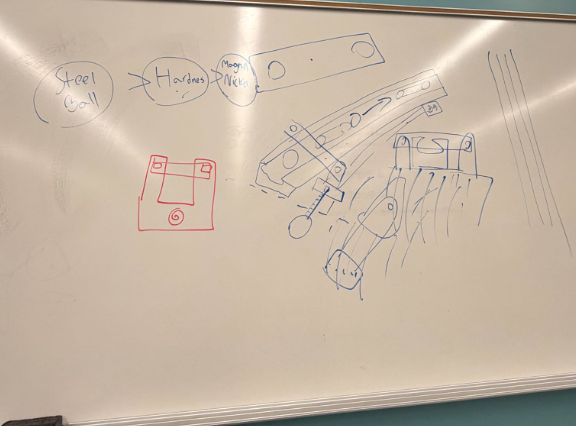
- How should the magnets be constrained?
- How much spacing is needed between stages?
- How can the projectile avoid being over-constrained by the magnetic field?
- Can each added stage create a visible velocity increase?
- How can repeated impacts be handled without destroying the system?
Sacrificial Impact Shield Development
A major durability issue was repeated steel-on-magnet impact. Permanent magnets are useful for the learning objective, but they are not ideal impact surfaces for a museum exhibit that may be fired hundreds of times per day.
To address this, I tested a hardened spring steel strip as a sacrificial impact shield placed in front of the magnet. The goal was to protect the magnet while still allowing effective momentum transfer through the collision.
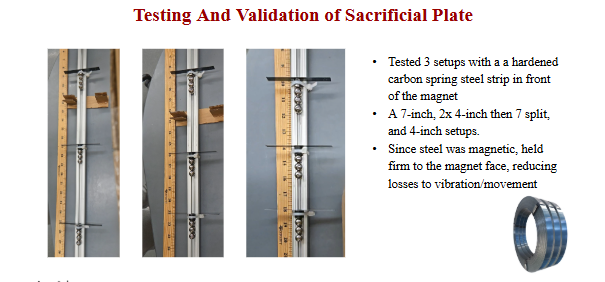
Because the strip was magnetic, it held itself firmly against the magnet face, reducing energy loss from vibration or looseness. I compared multiple shield setups and found that a shorter shield configuration showed the most promising combination of durability and launch performance.
The design also supported maintainability: rather than replacing damaged magnets or custom parts, museum staff could replace a simple off-the-shelf spring steel strip.
Reset Mechanism Development
The hardest part of the permanent magnet concept was not launching the ball. It was resetting the system in a way that a child could use safely and repeatedly.
Permanent magnets create a clear and intuitive launch interaction, but they also make reset difficult because the balls and magnets naturally want to stay together. I explored reset concepts that could separate and reposition the stages without requiring children to pull directly against high magnetic forces.
One concept used a lead screw driven by a hand wheel. The lead screw translated rotational input into controlled linear motion, moving a platform connected to the sacrificial plate and stage hardware. Linear guide shafts prevented unwanted rotation, while a connection rod kept the stages aligned.
The mechanism was designed around several goals:
- Keep the user interaction simple
- Avoid exposing magnets or pinch points
- Provide mechanical advantage during reset
- Allow worn sacrificial plates to be swapped out
- Keep the system modular for future refinement
Proof-of-Concept Testing
To validate the reset idea before building a full exhibit-scale system, I helped create a handheld proof-of-concept prototype using a hardened spring steel strip and clamping columns.
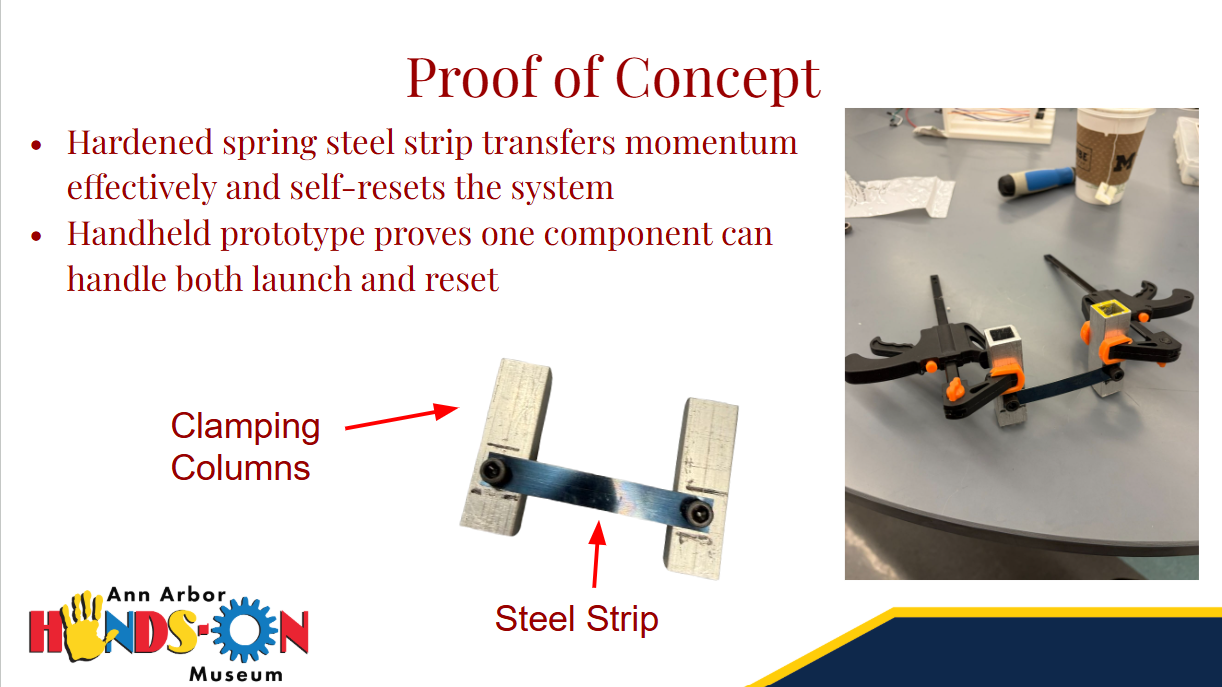
This prototype showed that one component could serve two roles: transferring momentum during launch and helping the system reset afterward. That finding was important because it reduced the number of separate mechanisms needed in the final design.
Gravity-Assisted Reset
The team also explored using a slight track angle to reduce the amount of reset travel required. Testing showed that even a small incline could let gravity assist the return motion after the ball moved a short distance away from the magnet.
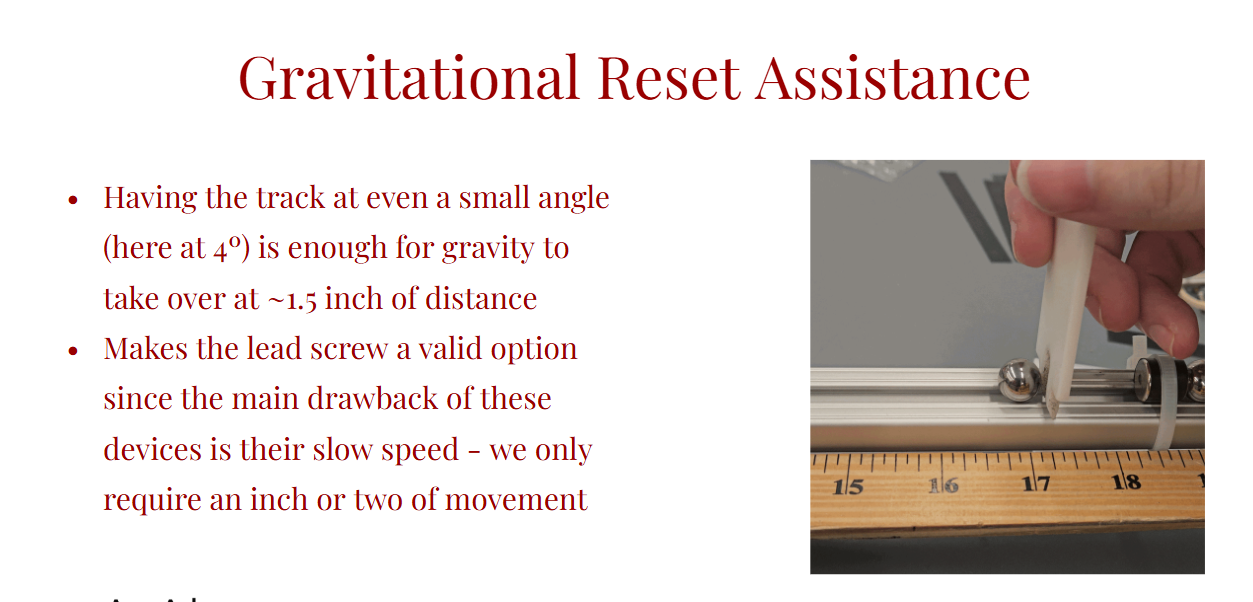
This made the lead screw concept more practical. Rather than forcing the mechanism to pull the ball through the entire return path, the lead screw only needed to move the system far enough for gravity to take over.
What I Owned
My contributions focused on the permanent magnet subsystem and reset mechanism development.
I worked on:
- Permanent magnet architecture evaluation
- Prototype construction and testing
- Sacrificial spring steel shield development
- Reset mechanism concept generation
- Lead screw reset mechanism CAD
- Gravity-assisted reset testing
- Design tradeoff analysis between permanent magnet and electromagnet approaches
- Durability and maintainability planning for museum use
Key Takeaways
This project taught me how different museum exhibit design is from a normal classroom prototype. A successful design cannot just work once. It has to work all day, survive rough handling, communicate the science clearly, and be maintainable by non-engineers.
The most important lesson was that good mechanical design is not only about performance. For this exhibit, the best solution also had to be safe, visible, intuitive, durable, and easy to reset.